Your garage has become a dumping ground. Tools scattered everywhere. Sports equipment piled in corners. Holiday decorations blocking the lawn mower. You can barely squeeze your car in anymore.
Sound familiar?
Here’s the thing: most garage organization fails because people buy random storage products without a plan. They end up with a slightly neater mess.
The good news is you can transform your garage into an organized, functional space in a single weekend. No professional help required. No expensive custom installations.
In this guide, I’ll show you our proven 5-zone organization system, compare the best garage storage solutions with real prices, and give you a step-by-step action plan you can execute this weekend.
Let’s get into it.
Quick Answer: The fastest way to organize a garage is to work in five zones and get everything off the floor — slatwall panels for frequently-grabbed tools and bikes, overhead racks for seasonal bins, and cabinets for chemicals and valuables. Clear and finish the floor first (tiles or a coating make it cleanable), then build vertical storage zone by zone. Wall-mounted slatwall delivers the biggest impact per dollar for most garages.

How We Evaluated Storage Solutions
We analyzed dozens of garage storage systems to find the best options at every price point. Our evaluation focused on what actually matters for long-term organization success.
Key criteria:
- Durability – Can it handle heavy tools, bikes, and equipment without sagging or breaking?
- Capacity – How much storage per square foot of wall space? Weight limits per hook or shelf?
- Installation – DIY-friendly with basic tools, or professional required?
- Flexibility – Can you reconfigure as needs change?
- Cost – Total price including mounting hardware and accessories
We also reviewed real user feedback, tested installation difficulty, and compared long-term value versus upfront cost.
Quick Picks: Best Garage Storage Systems

| Category | Solution | Price Range | Best For |
|---|---|---|---|
| Best Overall | Slatwall System | $90-$155 | Flexibility, pro look, heavy loads |
| Best Budget | Pegboard + Hooks | $30-$60 | DIYers on budget, light tools |
| Best Premium | Custom Cabinets | $500+ | Clean, hidden storage |
| Best Overhead | Ceiling Racks | $100-$200 | Seasonal items, bulky gear |
Now let’s break down the system that makes these solutions actually work.
The 5-Zone Garage Organization System
Here’s the thing about garage organization ideas you’ll find online:
Most are just random storage hacks. Clever, sure. But without a system, you end up with organized pockets surrounded by chaos.
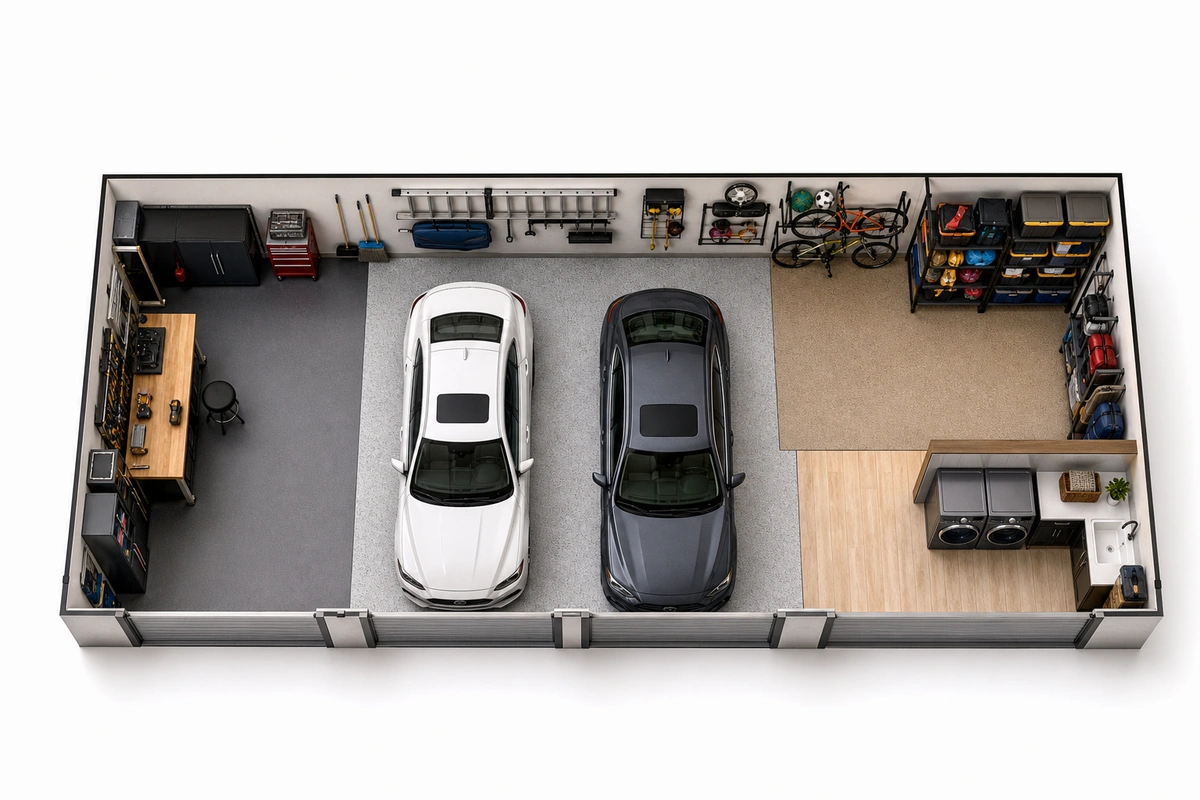
Our 5-zone approach divides your garage into functional areas. Each zone has a specific purpose and optimal storage solution. This methodology works whether you have a single-car garage or a three-car workshop.
Zone 1: Parking Zone (The Sacred Space)
This is your car’s territory. Keep it sacred.
The parking zone should remain completely clear at all times. No “temporary” storage. No overflow from other zones. The moment you allow encroachment, the garage reverts to chaos.
Requirements:
- Clear floor path with minimum 3 feet on each side of vehicle
- Floor protection from oil drips, salt, and tire marks
- No items blocking entry or exit paths
- Visual boundaries (floor color change or tape line)
Best solution: Interlocking PVC floor tiles serve dual purpose here. They protect your concrete from automotive fluids while creating a visual boundary that defines the parking zone. The raised pattern provides traction in wet conditions.
Pro tip: Install tiles only in the parking zone first. This creates a psychological boundary that discourages creep from other zones.
Zone 2: Tool Zone (Daily Access)
Your most-used items need the most accessible spot. This zone typically occupies the wall nearest your entry door or workbench area.
Think about what you grab multiple times per week: hand tools, tape measures, flashlights, safety glasses, work gloves.
Requirements:
- Eye-level placement for frequently used tools
- Easy grab-and-go access without moving other items
- Weight capacity for heavy power tools
- Visible organization (you should see what you have)
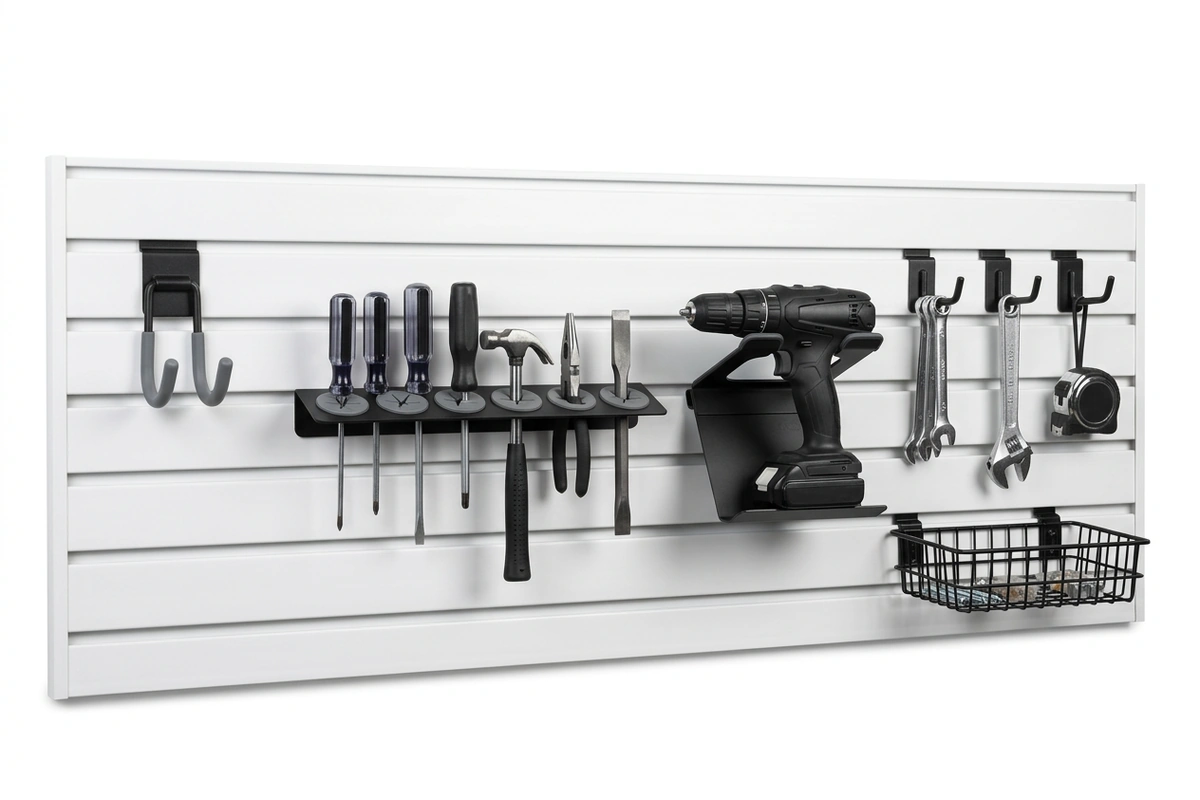
Best solution: Slatwall with hooks and tool holders. The adjustable nature lets you reconfigure as your tool collection grows. Heavy-duty panels handle the weight of power tools, battery chargers, and full toolboxes.
The key: Organize by frequency of use, not category. Your drill might logically belong with other power tools, but if you use it daily, it should be at arm’s reach.
Zone 3: Sports Zone (Family Active Gear)
Bikes, balls, helmets, rackets, and sports bags multiply faster than you can organize them. This zone needs special attention in family households.
Requirements:
- Vertical bike storage (floor space is premium real estate)
- Ball containment system (baskets or bins)
- Easy access for kids (low hooks and open bins)
- Room to grow as kids pick up new sports
Best solution: Wall-mounted bike hooks for vertical storage plus mesh baskets for loose gear. Position at heights appropriate for who uses each item. Adult bikes go high; kids’ gear stays low.
Pro tip: Install bike hooks to hang bikes by the front wheel, not the frame. This uses less wall depth and prevents frame damage.
Zone 4: Seasonal Zone (Long-Term Storage)
Holiday decorations, camping gear, winter equipment, pool supplies. Items you access maybe 2-4 times per year.
This zone belongs in the least convenient spots: ceiling space, high walls, back corners.
Requirements:
- Out-of-the-way location that doesn’t block daily access
- Protection from dust, moisture, and temperature swings
- Clear labeling for easy identification
- Safe ladder access when needed
Best solution: Overhead ceiling racks combined with clear storage bins. Label bins on multiple sides so you can identify contents from any angle. Group by season or event (all Christmas in one area, all camping in another).
The catch: Don’t overload ceiling storage. Keep weight under rack limits and store only truly seasonal items. If you’re accessing something monthly, it belongs in a more accessible zone.
Zone 5: Workshop Zone (Project Space)
If you do any home projects, car maintenance, or hobbies, you need dedicated workspace. This is the zone that separates a “garage” from a “storage unit with a car.”
Requirements:
- Sturdy workbench surface (36″ height is standard)
- Tool organization within arm’s reach while working
- Power outlet access for tools and charging
- Good lighting (add task lighting if needed)
- Clear floor space around bench for projects
Best solution: Solid workbench with pegboard or slatwall mounted directly above. Keep your 10 most-used tools within arm’s reach. Store everything else in the tool zone.
Bottom line: The workshop zone is about efficiency. Every second spent searching for a tool is a second not spent on your project. For flooring that supports long workshop sessions, see our workshop flooring guide covering anti-fatigue mats, PVC tiles, and zone planning.
15 Garage Storage Upgrades, Ranked by Impact
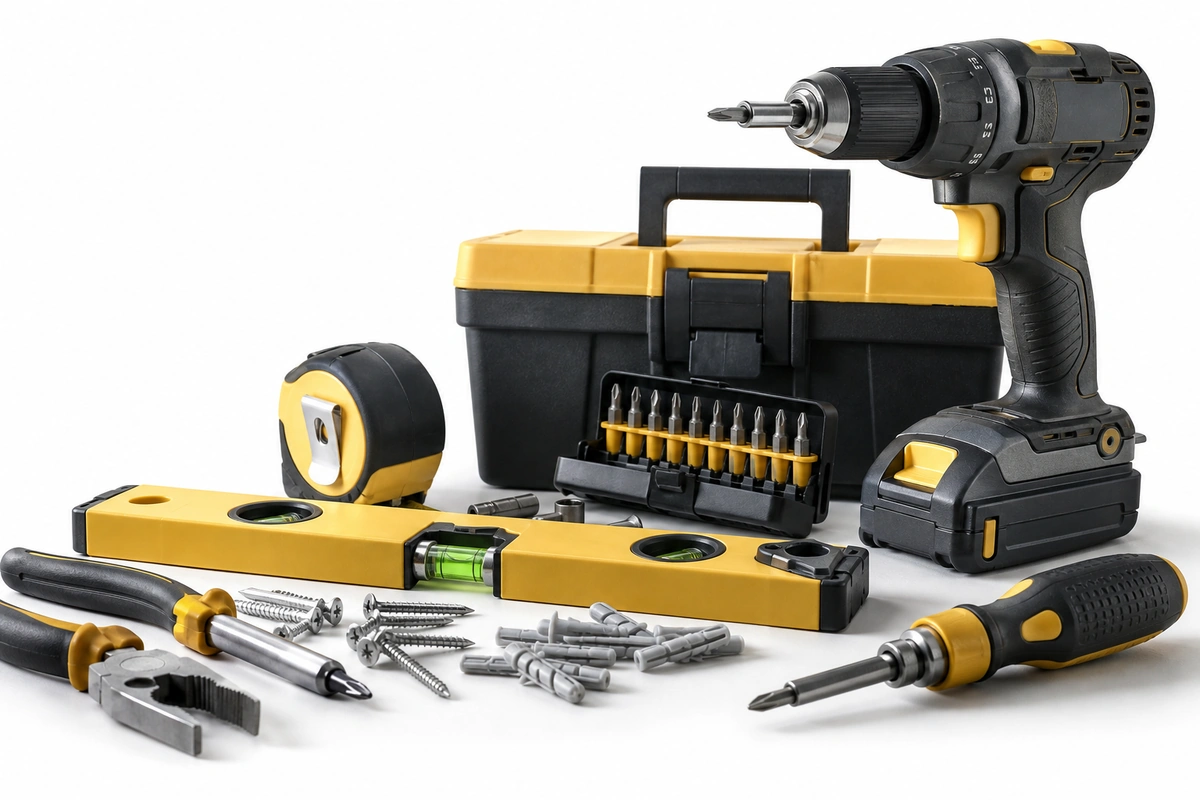
Zones tell you where things go; these fifteen upgrades are how they get there. They’re ordered by impact per dollar — the first six transform a wall, the rest finish the job. Prices are real 2026 figures, not estimates.
#1. NorskWall Slatwall Panels (Best Overall System)
Slatwall uses grooved horizontal panels that accept hooks, shelves, baskets, and specialized holders anywhere along the surface. Move accessories up, down, or sideways in seconds.
Why we recommend it:
The NorskWall Slatwall System stands out for its patented Kwik-Connect installation and heavy-duty cellular PVC construction. Unlike flimsy MDF panels, PVC won’t absorb moisture, rot, or warp over time.
Key specs:
- Price: $89.99 (2-panel NorskTrack kit) to $154.99 (8-panel NorskWall kit)
- Material: Cellular PVC (waterproof, rot-proof)
- Load capacity: 50+ lbs per accessory when properly mounted
- Installation: DIY with included hardware, mounts to studs
- Coverage: 8-panel kit covers approximately 32 square feet
Pros:
- Infinitely adjustable – reconfigure anytime
- Professional, finished appearance
- Handles heavy loads safely
- Waterproof material ideal for garages
- Accepts standard slatwall accessories
The catch: Higher upfront cost than pegboard. A full wall of slatwall runs $150-$300 versus $30-$60 for pegboard. But the flexibility, durability, and load capacity make it worth the investment for serious organization. For a complete deep-dive on materials, accessories, and installation, see our NorskWall slatwall system guide.
#2. Vertical Bike Hooks (Highest Impact per Dollar)
Store bikes by the front wheel on vertical bike hooks ($14.99/2-pack) and you reclaim a car-sized patch of floor for the price of a pizza. One of the highest-impact organization moves you can make — a family of four hangs four bikes in the wall space one bike used to block.
#3. An Assorted Slatwall Hook Kit
Slatwall hooks come in dozens of configurations for different purposes:
- Vertical bike hooks ($14.99/2-pack) – Store bikes by front wheel to save floor space. One of the highest-impact organization moves you can make.
- Quad hooks ($15.99-$17.99/2-pack) – Four-prong design holds ladders, lumber, extension cords, and hoses securely.
- Big mouth hooks ($17.99/2-pack) – Wide opening accepts thick items like rope coils and heavy hoses.
- S-hooks ($16.49/2-pack) – Flexible hanging for bags, backpacks, and items with handles.
- Mini hooks ($24.99/8-pack) – Small items like hand tools, tape measures, and safety glasses.
Pro tip: Buy the value pack ($55.99 for 14 assorted hooks) to start. Experiment with placement for a week before committing to final positions.
#4. Slatwall Baskets and Bins
Slatwall baskets contain loose items that would otherwise end up in piles:
- Sports balls and gloves
- Gardening supplies and seeds
- Car wash supplies and microfiber cloths
- Kids’ outdoor toys
Wire mesh baskets let you see contents at a glance. Solid bins hide clutter but require labeling.
#5. Wall-Mounted Slatwall Shelves
Wall-mounted slatwall shelves hold heavy items that won’t hang:
- Paint cans and stain containers
- Power tool cases and chargers
- Boxed items and storage containers
- Shop vacuum and accessories
Choose shelf depth based on what you’re storing. Deeper isn’t always better – it just encourages clutter buildup.
#6. Hanging Bags and Caddies
Hanging bags work for soft, bulky items:
- Seasonal clothing and jackets
- Camping sleeping bags and tents
- Sports gear bags
- Lawn chair storage
Caddies organize small hardware like screws, nails, and fasteners that would otherwise live in junk drawers.
#7. Pegboard for the Light-Duty Corner
The classic budget option that’s been organizing garages since the 1960s.
Key specs:
- Price: $15-$30 per 4×8 sheet
- Material: Tempered hardboard or metal
- Load capacity: 10-15 lbs per hook (hardboard), 25+ lbs (metal)
- Installation: Mount to wall with spacers for hook clearance
Pros:
- Cheapest wall storage option
- Available at any hardware store
- Huge variety of hook and accessory options
- Easy to cut and customize
Cons:
- Limited weight capacity (hooks pull out under heavy loads)
- Hardboard absorbs moisture and can swell
- Looks utilitarian rather than finished
- Accessories can shift and fall
Best for: Light tools, craft supplies, and budget-conscious DIYers who don’t need heavy-duty capacity.
#8. Overhead Ceiling Racks
Perfect for items you access 2-4 times per year. Uses otherwise wasted vertical space.
Key specs:
- Price: $100-$300 for quality ceiling racks
- Capacity: 250-600 lbs depending on model
- Installation: Must mount to ceiling joists (not drywall alone)
Pros:
- Uses space that would otherwise be empty
- Keeps floor and walls clear for daily-use items
- Great for bulky seasonal items (holiday bins, camping gear)
- Platform style works for large items; hoist systems work for single heavy items
Cons:
- Requires ladder access
- Must find and mount to joists
- Not for items you need frequently
- Weight limits are real (don’t ignore them)
Best for: Holiday decorations, camping gear, luggage, seasonal sports equipment.
#9. Lockable Cabinets
The premium option for homeowners who want a showroom-quality garage.
Key specs:
- Price: $200-$500+ per cabinet unit
- Material: Steel, powder-coated metal, or heavy-duty plastic
- Load capacity: 100+ lbs per shelf
Pros:
- Hides clutter completely behind doors
- Professional, clean appearance
- Lockable options for hazardous items or valuables
- Adjustable shelving inside
Cons:
- Most expensive storage option
- Fixed position once installed
- Takes up more floor depth than wall systems
- Limited flexibility for odd-shaped items
Best for: Homeowners who want the garage to look like an extension of the house, or those storing items that need protection from dust.
#10. Interlocking PVC Floor Tiles
Organization stops at eye level for most people — then the floor stays an oil-stained mess under all those tidy walls. Interlocking PVC tiles ($3.99–4.99/sq ft) snap over the slab in an afternoon, resist oil and brine, and make the whole garage read as finished. Our PVC garage floor tiles guide covers patterns, edging, and install.
#11. A Parking-Zone Marker
The cheapest upgrade on this list: a tennis ball on a string from the ceiling, or a $15 parking mat, marks the exact stopping point so the car lands in the same footprint every time. The parking zone is the anchor every other zone is measured from — guard it.
#12. Labeled Seasonal Rotation Bins
Four to six matching lidded bins ($8–15 each), labeled by season — holiday, summer, winter, camping — turn the seasonal zone from a pile into a rotation. Twice a year, the off-season bins go up to the ceiling rack and the in-season ones come down. Matching bins stack; mismatched ones avalanche.
#13. A Sports Gear Corral
One wire basket or ball rack at kid height ($20–35) ends the nightly ball hunt. The rule that makes it work: gear lives in the corral, not “wherever practice ended.” Pair it with two S-hooks for bags and the sports zone runs itself.
#14. A Cordless Tool Charging Station
Dedicate one shelf with a power strip ($25 total) to chargers and batteries. Every dead-battery delay traces back to chargers scattered across three rooms; one station means every battery is always either in use or charging.
#15. The One-Box Donation Rule
Keep one open box near the door labeled “out.” Anything you touch and think “why do I still own this” goes in; when it’s full, it goes to donation the same week. Organization systems manage what you keep — this is the upgrade that shrinks what needs managing.
Bottom Line
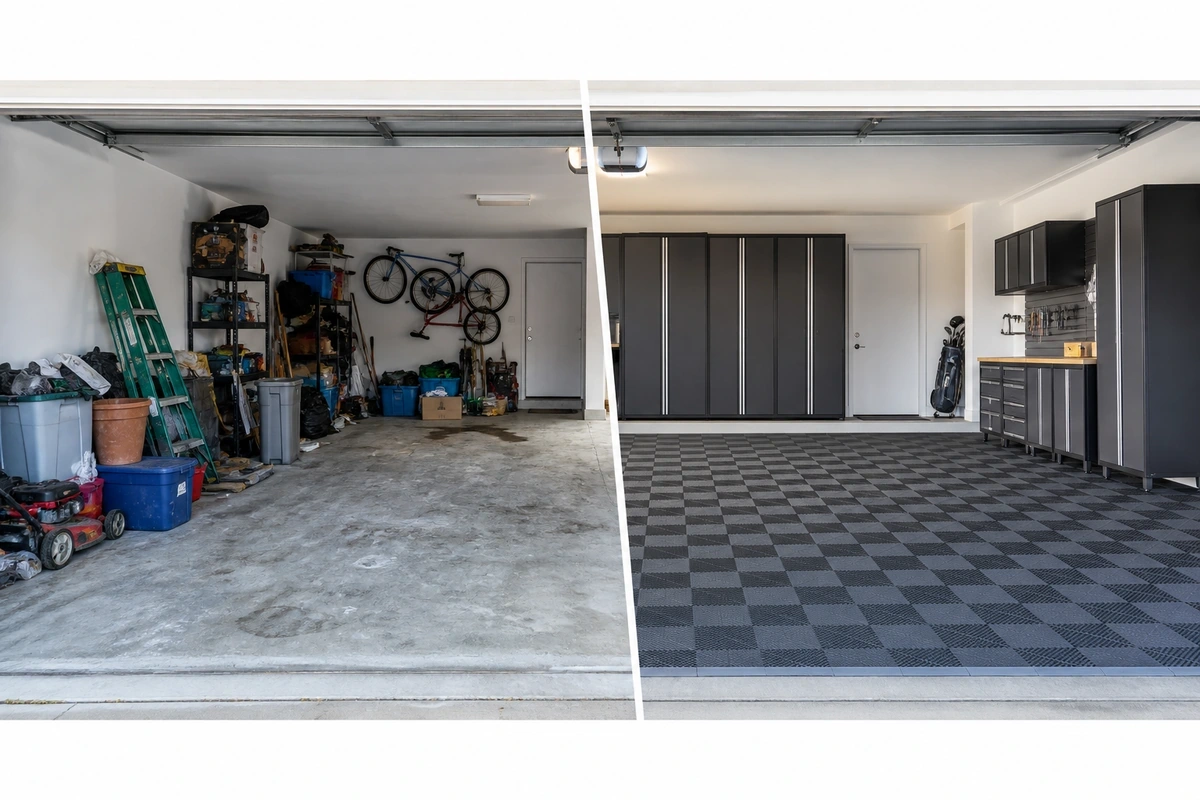
For most people: A slatwall system like NorskWall ($90-$155 for panels) offers the best balance of flexibility, durability, and professional appearance. Add $50-$80 in hooks and accessories for a complete solution under $250.
On a tight budget: Start with pegboard in your tool zone only. Upgrade to slatwall later as budget allows. The 5-zone system works at any price point.
Want the cleanest look: Combine cabinets for hidden storage with slatwall for visible tool organization. Best of both worlds.
The key is starting with zones. Figure out what goes where first, then add storage systems to match your plan. Random product purchases create random results.
Action Plan: Organize Your Garage This Weekend

Here’s your step-by-step plan for a complete garage transformation:
Day 1: Clear and Plan (4-6 hours)
- Clear everything out – Yes, everything. Move it to the driveway or yard. Sweep the floor. See your garage empty.
- Sort into 4 piles – Keep, donate, sell, trash. Be ruthless. If you haven’t used it in 2 years, you probably won’t.
- Map your zones – Sketch your garage on paper. Label the 5 zones based on your specific needs and family usage patterns.
- Measure and plan – Measure wall space in each zone. Calculate how much storage system you need.
Day 2: Install and Organize (4-8 hours)
- Install floor protection – Optional but recommended. Interlocking floor tiles protect concrete, look great, and define your parking zone.
- Mount wall systems – Start with your tool zone. Expand from there as time allows.
- Add accessories – Hooks, baskets, shelves. Position based on frequency of use.
- Label everything – Bins, shelves, zones. Labels prevent backsliding.
Total time: 8-16 hours for a 2-car garage depending on clutter level.
Frequently Asked Questions
How do I organize my garage on a budget?
Start with pegboard ($15-$30) and basic hooks ($10-$20). Use repurposed items like coffee cans for small hardware and old buckets for balls. Label everything with masking tape and marker.
Add one slatwall panel ($45-$50) when budget allows for your most-used tools. The 5-zone system works at any price point – it’s about methodology, not money.
Total budget approach: $50-$150 for a functional transformation.
What is the best garage storage system?
Slatwall systems offer the best combination of flexibility, durability, and professional appearance. They accept dozens of accessory types, handle heavy loads (50+ lbs per hook), and can be reconfigured as needs change.
NorskWall’s Kwik-Connect system specifically stands out for DIY-friendly installation and waterproof PVC construction that won’t rot in garage conditions.
How much does garage organization cost?
Typical ranges:
- Budget approach: $50-$150 (pegboard, hooks, bins, labels)
- Mid-range: $200-$500 (slatwall system with accessories)
- Premium: $1,000+ (custom cabinets + slatwall + floor tiles)
Most homeowners spend $200-$400 for a complete transformation that lasts years.
Slatwall vs pegboard: which is better?
Slatwall wins for weight capacity (50+ lbs vs 10-15 lbs), durability (PVC vs moisture-absorbing hardboard), and appearance (finished look vs utilitarian).
Pegboard wins on upfront price and availability.
For tool storage and heavy items, invest in slatwall. For craft rooms, light items, and tight budgets, pegboard works fine. Many garages use both: slatwall in the main tool zone, pegboard in secondary areas.
How long does it take to organize a garage?
Plan for one weekend.
- Day 1: Clear out, sort, and plan zones (4-6 hours)
- Day 2: Install storage systems and organize (4-8 hours)
A typical 2-car garage takes 8-16 hours total depending on existing clutter level and storage system complexity. Don’t rush – proper planning prevents reorganization later.
Can I install slatwall myself?
Yes. Systems like NorskWall include all mounting hardware and require only basic tools: drill, level, stud finder, tape measure.
Most homeowners complete an 8-foot wall section in 2-3 hours. The key is finding studs – slatwall must mount to studs for full weight capacity, not just drywall.
Watch the manufacturer’s installation video first. It’s easier than it looks.
Ready to Transform Your Garage?
Stop stepping over clutter. Stop wasting weekends searching for tools. Start with the 5-zone system, add storage as you go, and reclaim your garage.
Need floor protection too? Check our complete guide to garage flooring options.