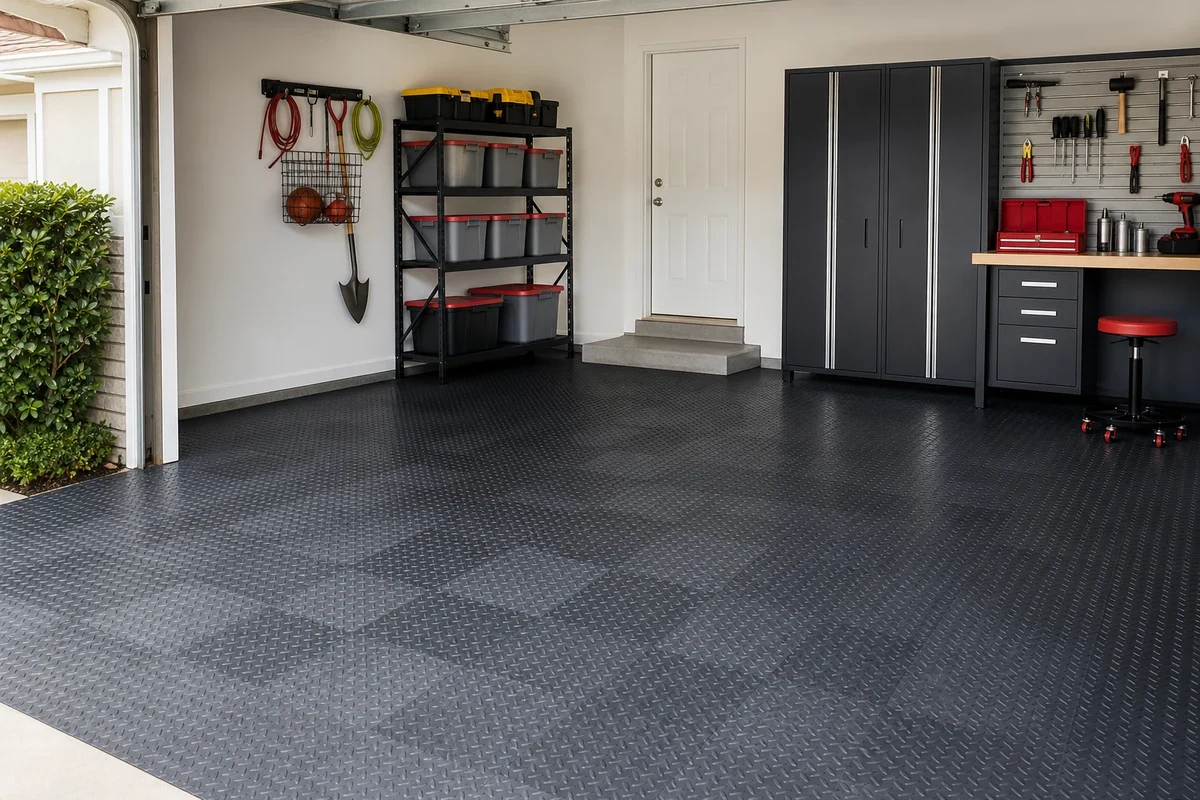
Every winter, millions of homeowners unknowingly let road salt eat through their garage floor — one parking session at a time.
If you’ve noticed pitting, flaking, or white powder residue on your concrete, that’s salt damage. And it only gets worse.
In this guide, you’ll learn how to protect your garage floor from snow and salt — and exactly why vented drain interlocking tiles beat containment mats for long-term protection.
Let’s get into it.
Quick Answer: For snow and road salt, full-floor vented drain interlocking PVC tiles beat containment mats — they let melt and slush drain through and air-dry underneath, so salt never sits against your concrete. Containment mats only catch runoff under one vehicle and trap brine on the slab. Cover the whole floor before winter and rinse the tiles periodically to flush the salt away.
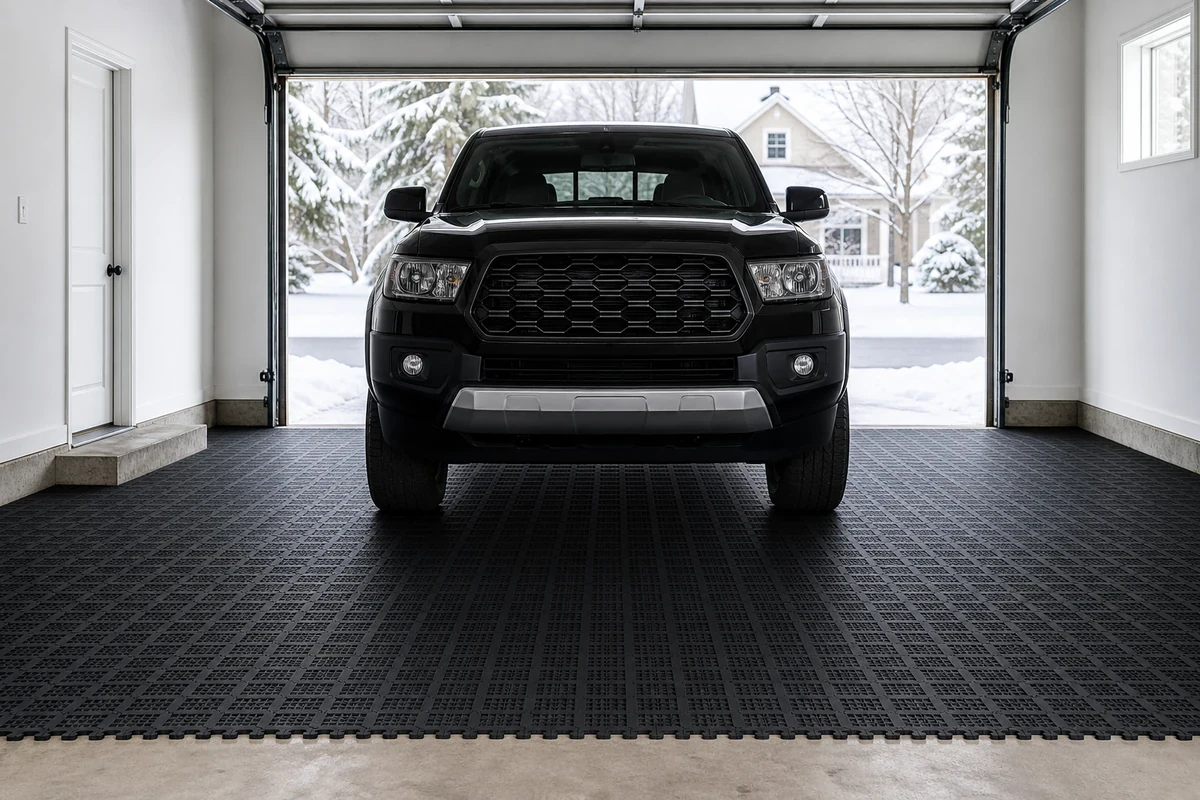
Do Garage Floor Mats Work for Snow?
Yes — a containment mat with raised edges will hold 20–60 gallons of snowmelt and salt brine off your slab, and for one parked car it works this winter. The catch is lifespan and labor: pooled brine has to be squeegeed out before it overflows or tracks, edges crack in the cold within 2–4 seasons, and a failed mat is a full replacement. Vented drain tiles solve the same problem passively — melt drains through, air-dries underneath, and the floor never needs bailing. The rest of this guide covers when each approach survives a real winter.
How Snow and Salt Actually Destroy Your Garage Floor
Concrete looks tough. But it’s porous — full of tiny channels that absorb moisture, chemicals, and road brine with every wet vehicle that drives in.
Here’s what happens next.
When salt-laden snowmelt soaks into your concrete, it sits in those pores. When temperatures drop overnight, that liquid expands. The concrete surface cracks, chips, and eventually “spalls” — that gritty, sand-like surface deterioration you see on older driveways.
Road salt comes in three main forms: sodium chloride, calcium chloride, and magnesium chloride. All three are corrosive to unprotected concrete. Calcium chloride is particularly aggressive — it stays active at lower temperatures and drives deeper into pores.
The damage is cumulative. Three to five winters without protection can leave visible pitting. Once you see spalling, you’re looking at $3–$15 per square foot to repair, depending on severity.
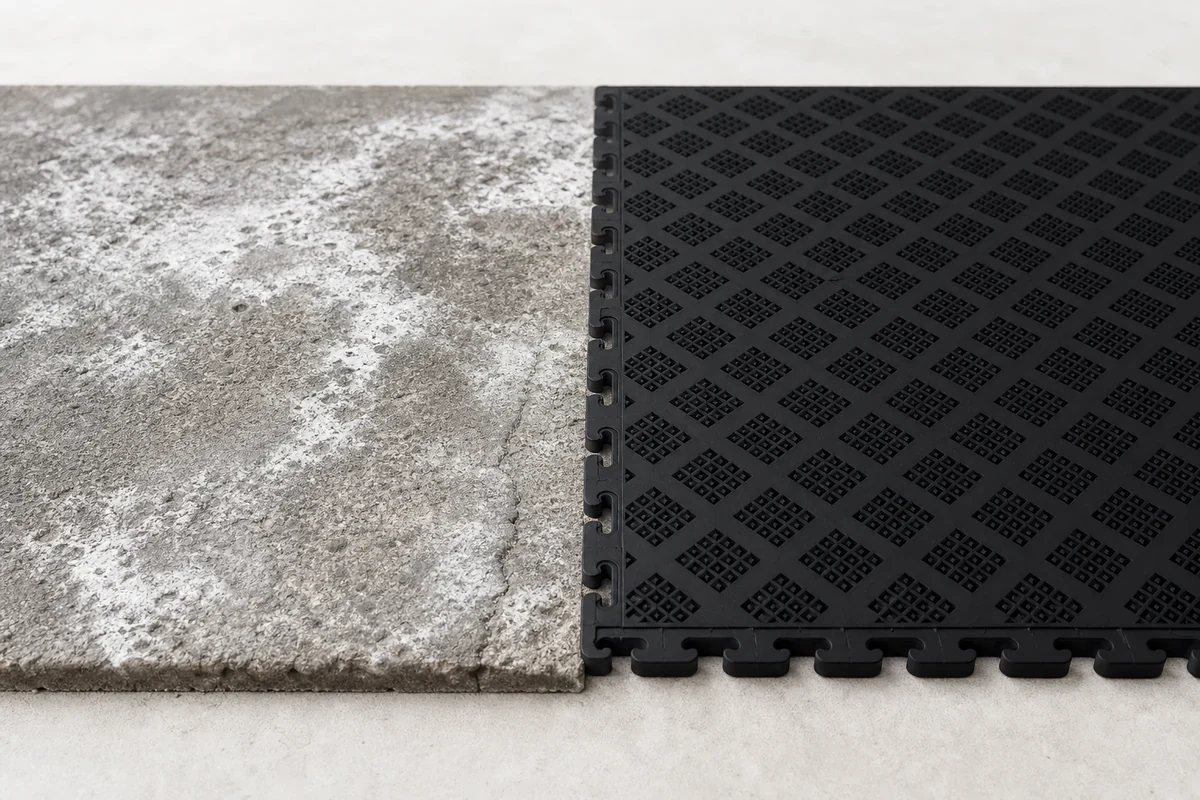
The solution? Stop the salt before it touches your concrete.
3 Ways to Protect Your Garage Floor This Winter
There’s no single “right” answer — each option suits a different situation. Here’s what you’re actually choosing between.
Option 1 — Containment Mats
Containment mats are roll-out vinyl or rubber mats with raised edges that sit under your vehicle and catch snowmelt, slush, and road salt drip.
Pros: Affordable ($150–$400), quick to deploy, no installation required.
Cons: They only protect the footprint of your vehicle — leaving the rest of your concrete completely exposed. They can slide, bunch under tires, and need to be sized for your specific vehicle.
Best for: Renters, people who want minimal effort, or very light-use garages.
Option 2 — Concrete Coatings
Epoxy, polyaspartic, or polyurea coatings create a sealed, non-porous surface that blocks salt and moisture from reaching the concrete below.
Pros: Maximum protection, seamless finish, very durable.
Cons: Professional installation costs $1,500–$5,000+ for a typical two-car garage. Cure time is 24–72 hours. And it’s permanent — no undoing it later.
Best for: Homeowners who want a premium, forever-floor and plan to stay long-term.
Option 3 — Interlocking PVC Tiles
Modular tiles that snap together over existing concrete, covering the entire garage floor. PVC is chemically inert — it doesn’t absorb salt, moisture, or automotive fluids.
Pros: Full-floor coverage, DIY-friendly, no adhesive needed, removable and reusable, salt and chemical resistant.
Cons: Edges need trim strips at doorways. Requires a clean, level concrete surface.
Best for: Most homeowners — the best balance of protection, cost, and ease.
| Feature | Containment Mat | Concrete Coating | Interlocking PVC Tiles |
|---|---|---|---|
| Coverage | Under vehicle only | Full floor | Full floor |
| Installation | 5 minutes | 1–2 days (professional) | 4–6 hours (DIY) |
| Cost | $150–$400 | $1,500–$5,000+ | $300–$800 |
| Permanence | Temporary | Permanent | Semi-permanent (removable) |
| Salt Resistance | Moderate | Excellent | Excellent |
| DIY Friendly | Yes | No | Yes |
| Winter Performance | Partial (car area only) | Excellent | Excellent |
Bottom line: if you want full-garage winter protection without a professional crew, interlocking PVC tiles are the clear answer.
For a deeper comparison of tile types, patterns, and coatings, see our guide on epoxy vs interlocking tiles.
Why Vented Drain Tiles Are the Best Winter Tile for Snow
Here’s a problem most tile buyers don’t think about.
Most interlocking garage tiles have a solid surface. When snow tracks in on your tires and melts at room temperature, that water sits on top of the tile. On cold nights, it refreezes — creating a thin but dangerous ice layer right where you step.
Vented drain tiles solve this with a simple design change.
Instead of a solid base, the tile has an open grid — a series of gaps that allow water, snowmelt, and slush to drain directly through the tile to the concrete below. The liquid flows to the edges of the garage and out through the gap under your door.
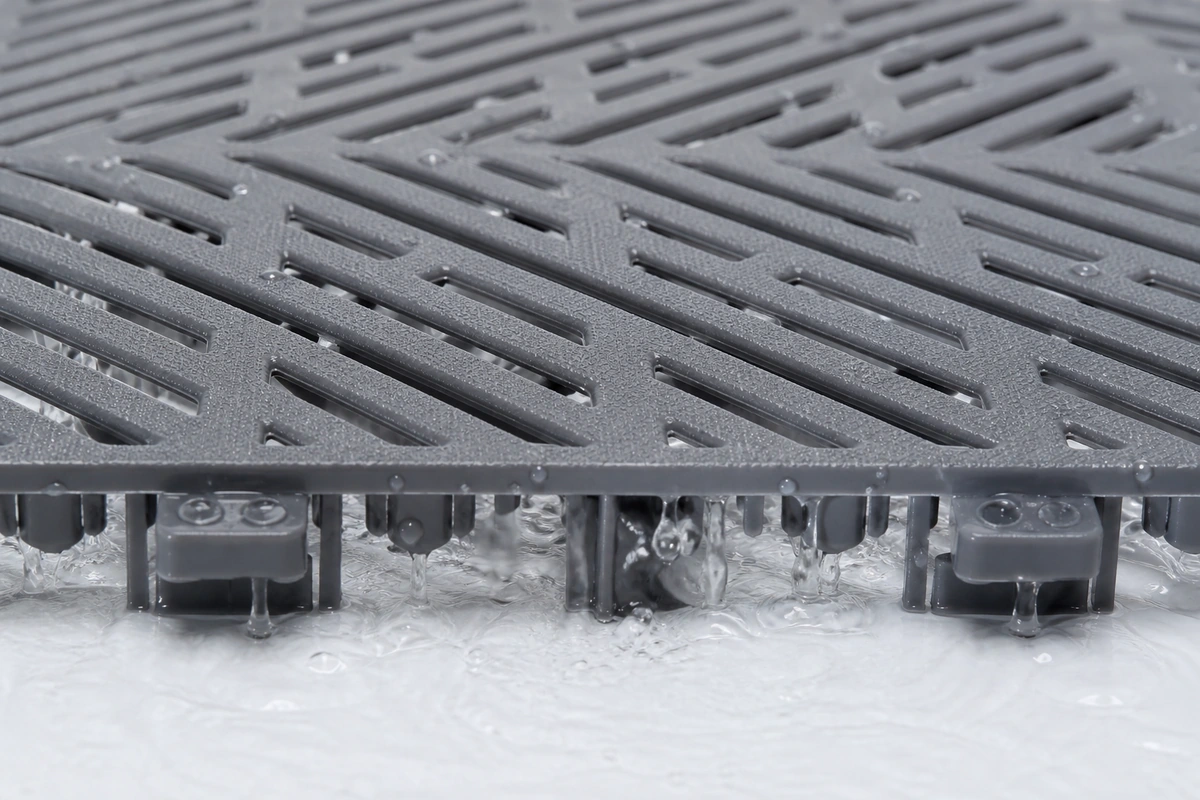
The result: a dry tile surface even as snowmelt happens underneath.
No pooling. No refreezing on the tile top. No ice hazard.
And because the tile itself is PVC, it’s chemically resistant to sodium chloride, calcium chloride, and every other de-icing compound your car tracks in. The DURAFLEX Diamond is specifically rated for machine oil, coolant, brake fluid, and winter saltwater — one of the few PVC tiles with published chemical resistance data.
Want to know the best part? The vented design also protects the concrete indirectly. Salt disperses through the drainage rather than concentrating in one spot on the concrete below.
Norsk-Stor Winter Garage Flooring Options
Three tiles. Three different winter scenarios. Here’s how to choose.
Vented Drain Tiles — Best for Active Snowmelt Drainage
If you live in heavy-snow country and your garage fills with slush every time you park, this is your tile.
The open-grid vented base drains water through the tile rather than letting it pool. Think of it as a built-in drainage system for your garage floor — no drain installation required.
- Material: PVC (salt and chemical resistant)
- Thickness: 0.25″
- Load rating: 5,000 lbs rolling / 20,000 lbs static
- Installation: Floating interlock, no adhesive
The catch: the open grid means furniture legs or small items can drop through the gaps. For parked vehicles and rolling equipment, it works perfectly.
DURAFLEX Diamond — Best for Full-Garage Salt Protection
If you want full-floor coverage that handles every winter chemical your car brings in, the DURAFLEX Diamond is purpose-built for it.
Published chemical resistance: machine oil, coolant, brake fluid, and winter saltwater. The raised diamond surface provides grip even when wet, and the industrial pattern hides surface scratches from snow shovels and winter boots.
- Material: PVC
- Thickness: 0.25″ / 0.28″ (hidden interlocking version)
- Load rating: 5,000 lbs rolling / 20,000 lbs static
- Colors: Black, Metallic Graphite, Metallic Tin
The catch: solid surface means standing water stays on top. Use a squeegee for drainage in very wet conditions.
Raised Coin Tiles — Best for Wet-Surface Traction
For garages with heavy foot traffic — or households with kids or elderly family members — the Raised Coin pattern is your wet-weather safety floor.
The coin texture creates consistent micro-grip across the entire surface. On wet or icy surfaces, it performs significantly better than smooth finishes. Salt-resistant PVC keeps it from degrading over seasons.
- Material: PVC
- Thickness: 0.25″
- Load rating: 5,000 lbs rolling / 20,000 lbs static
- Colors: Black, Dove Gray, Tan
The catch: lighter colors (Dove Gray, Tan) show salt residue more visibly — easy to clean, but more frequent cleaning is needed in heavy-snow seasons.
How to Install Garage Floor Tiles Before Winter
You don’t need a contractor. You don’t need adhesive. And you can do a full two-car garage in a single afternoon.
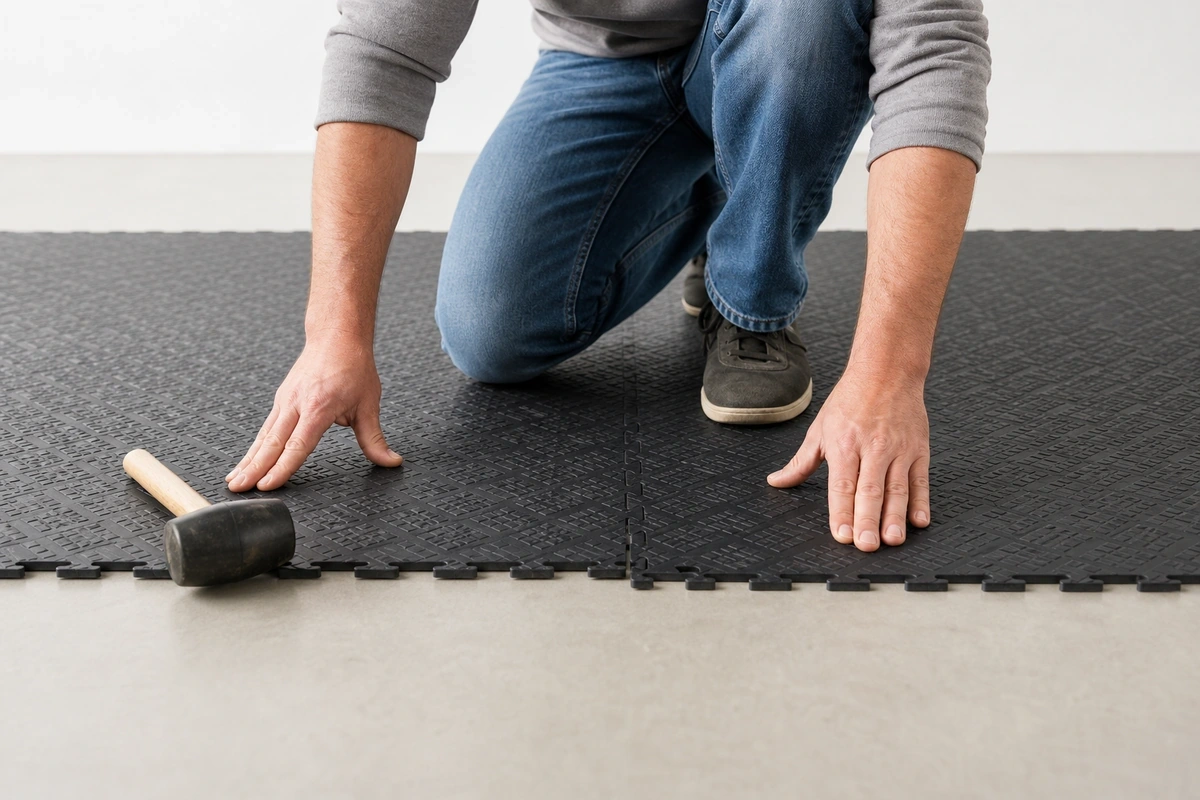
- Clear and clean the concrete. Sweep out debris, then mop with a mild detergent solution. Let it dry fully — wet concrete under tiles traps moisture.
- Check for moisture seepage. Tape a plastic sheet to the floor overnight. If condensation forms on the underside, apply a concrete sealer before tiling — especially important with vented tiles.
- Plan your layout. Start from the most visible corner (usually the garage door side). Chalk a line so rows stay straight.
- Snap tiles together. Row by row, interlocking each tile. No adhesive, no screws, no mess. A rubber mallet helps seat tiles firmly on uneven surfaces.
- Cut edge tiles. Use a utility knife for straight cuts or a jigsaw for complex shapes. Score-and-snap works well for PVC.
- Install edge trim. Trim strips at doorways and exposed edges prevent tiles from sliding and create a finished look.
Tools needed: Rubber mallet, measuring tape, utility knife or jigsaw, chalk line, broom.
Time estimate: A standard two-car garage (~400 sq ft) takes 4–6 hours for most DIYers.
One key advantage over coatings: tiles float on the concrete with no adhesive. No cure time — you can park on them the same day. For a complete walkthrough of layouts and edge-cutting techniques, see our complete guide to garage floor tiles.
Winter Garage Floor Maintenance
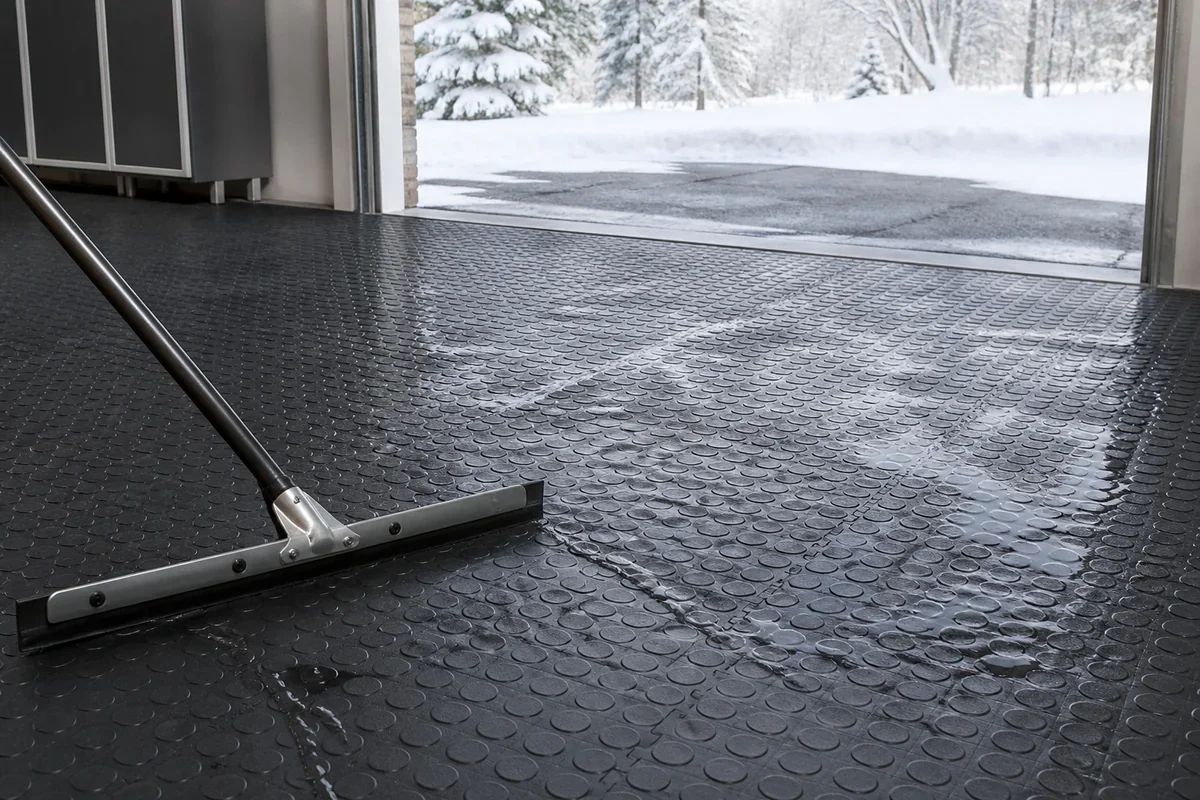
Once your tiles are down, maintenance is straightforward.
During snow season: Let snowmelt drain naturally through vented tiles, or squeegee standing water to the garage door edge for solid tiles. Salt residue appears as a white film — normal and harmless on PVC.
Monthly cleaning: Mop with warm water and mild dish soap. No special cleaners needed. PVC doesn’t absorb stains.
Spring refresh: Pull up tiles (interlocking means this takes minutes), take them outside, pressure-wash both sides, air-dry, and reinstall. Your concrete underneath stays clean and protected all year.
Damaged tiles: Individual tiles can be replaced without disturbing the rest of the floor. Pull up a row, swap the damaged tile, snap it back. No contractors, no downtime.
Frequently Asked Questions
Do interlocking PVC tiles hold up to road salt?
Yes. PVC is chemically inert to sodium chloride, calcium chloride, magnesium chloride, and most de-icing compounds. The DURAFLEX and Vented Drain lines are specifically rated for winter saltwater. Unlike bare concrete, PVC doesn’t absorb or react with road brine — salt sits on the surface and wipes off.
What’s the difference between vented and solid garage tiles for winter?
Solid tiles keep snowmelt on the surface, where it can pool and refreeze into ice. Vented tiles have an open-grid base that drains water through to the concrete below, preventing pooling and ice formation on the walking surface. In heavy-snowmelt garages, vented tiles eliminate the ice hazard that solid tiles create.
Do I still need a containment mat if I install interlocking tiles?
Generally no. Interlocking tiles cover the full garage floor, leaving no bare concrete exposed. A containment mat makes sense only if you want to capture very large volumes of water quickly — for example, in extremely high-snowfall regions where you drive in heavy accumulation daily.
Will PVC tiles crack in freezing temperatures?
No. PVC maintains flexibility in cold temperatures and doesn’t crack in freeze-thaw cycles. This is a key advantage over epoxy coatings, which can delaminate when the concrete beneath shifts. Floating installation (no adhesive) means the tiles move with the concrete, not against it.
Do I need to seal my concrete before installing tiles?
Recommended, not required. A concrete sealer before tile installation adds a second layer of protection — especially useful with vented tiles, where snowmelt drains through to the concrete surface. If your garage has any history of moisture seeping up from below, sealing is strongly recommended.
How many tiles do I need for a two-car garage?
A typical two-car garage is 400–500 sq ft. Each 6-pack covers 24 sq ft. Budget for 17–21 packs, plus 5–10% extra for cuts at edges and around obstacles. Measure your specific garage length and width, multiply for total square footage, then divide by 24 to get the number of packs needed.
The Bottom Line
Salt damage is real, cumulative, and expensive to fix.
The good news: it’s entirely preventable.
Containment mats are a partial fix. Coatings are permanent and expensive. Interlocking PVC tiles — especially vented drain tiles — give you full-floor protection, DIY installation in a single afternoon, and zero ongoing costs beyond annual cleaning.
If you’re parking on bare concrete every winter, this is the upgrade that pays for itself.
Looking for guidance on choosing between tile types, patterns, and accessories? Read our garage flooring options comparison or explore all garage flooring options for a full material breakdown.