Updated June 11, 2026 — competition-spec sources linked, scenario picks re-verified against the current Norsk-Stor catalog.
The right weightlifting flooring depends on where you lift, not just what you lift. A home gym over a finished basement needs noise control and subfloor protection. A garage weightlifting setup has to survive oil, temperature swings, and hot tires. A competition-grade platform prioritizes barbell bounce and stability under 400+ lb drops.
Unlike general gym flooring designed for treadmills and light dumbbells, weightlifting flooring must withstand repeated high-impact drops of 200–700+ pounds. A poor choice leads to cracked subfloors, noise complaints, and premature equipment damage. The right setup protects your investment while enhancing training performance.
This guide breaks down weightlifting flooring by scenario — home gyms, garage weightlifting setups, and competition-grade platforms — tested under real-world conditions. You’ll see exactly which thickness handles your typical drop weights, how to build a DIY platform for under $300, and proven strategies for apartment-friendly noise reduction. For a broader overview of gym floor protection, see our guide to best home gym flooring.
Quick Answer: Match the floor to your heaviest lift. For general training, Norsk Rubber-Tec gym tiles (0.70″, $3–4/sq ft) handle dumbbells, machines, and rack areas. For Olympic lifting, a dedicated DIY platform gives proper barbell bounce; for heavy powerlifting deadlifts, ¾” horse stall mats ($0.83–1.25/sq ft) take the abuse.
How We Tested Weightlifting Flooring
Our testing methodology evaluates weightlifting flooring performance under realistic conditions:
Drop Testing
We performed controlled drops at multiple weights: 135 lbs, 225 lbs, 315 lbs, and 405 lbs. Each weight was dropped from waist height (deadlift simulation), shoulder height (clean simulation), and overhead (snatch simulation). Each flooring type underwent 10+ drops per weight to assess durability and impact absorption.
Noise Measurement
Using a calibrated decibel meter, we measured noise levels for each weightlifting flooring type compared to bare concrete (baseline). This data is critical for apartment dwellers and shared spaces where noise reduction matters.
Thickness and Impact Assessment
We evaluated how different thicknesses (8mm, 10mm, 20mm, ¾-inch) compress under impact and recover over time. Proper bounce characteristics are essential for Olympic lifting technique work.
Long-Term Durability
Six months of heavy use revealed which materials maintain their integrity under daily drops, and which develop cracks, edge separation, or permanent compression.
After extensive testing, we identified the best weightlifting flooring for each lifting style, budget, and space constraint.
At a Glance: Quick Picks
| Category | Recommendation | Price Range | Best For |
|---|---|---|---|
| Best General Training Zone | Norsk Rubber-Tec Gym Tiles (0.70″) | $3-4/sq ft | Dumbbell and machine work, rack areas — pair with stall mats or a platform for drop zones |
| Best Olympic Lifting | DIY Lifting Platform (8’x8′) | $250-350 | Proper barbell bounce, technique training, 300+ lbs drops |
| Best Powerlifting | Horse Stall Mats (¾”) | $0.83-1.25/sq ft | Heavy deadlifts (400+ lbs), extreme durability, budget builds |
| Best Apartment-Friendly | Crash Pads + 8mm Rubber Base | $400-600 | 70-80% noise reduction, second-floor gyms, neighbor-friendly |
| Best Large Areas | Rubber Rolls (8-12mm) | $2-3/sq ft | 200+ sq ft spaces, seamless appearance, permanent setups |
| Best Budget | Horse Stall Mats (Tractor Supply) | $59/mat | 10-20 year lifespan, unbeatable cost per sq ft |
Understanding Weightlifting Flooring
What Makes Weightlifting Flooring Different?
General Gym Flooring is designed for machines, light dumbbells, and cardio equipment:
- • Thickness: 4-8mm
- • Material: EVA foam, thin rubber
- • Impact level: Low to moderate (<100 lbs drops)
Weightlifting Flooring must withstand repeated heavy barbell drops:
- • Thickness: 20mm to ¾-inch (or multi-layer platforms)
- • Material: High-density rubber, multi-layer platforms
- • Impact level: High (200-700+ lbs drops from various heights)
The difference isn’t just thickness—it’s about material density, shock absorption, and structural design to protect both your subfloor and lifting equipment. Choosing the right weightlifting flooring ensures your training space can handle years of heavy drops without damage.
Impact Forces by Lifting Style
Olympic Lifting (Snatch, Clean & Jerk)
Olympic lifts involve the fastest drops, often from overhead with minimal control. The barbell must bounce properly to protect the bar, plates, and lifter’s joints. These lifts generate maximum noise and require either thick rubber (30mm+) or dedicated platforms. Proper weightlifting flooring for Olympic lifts prevents equipment damage and provides the bounce characteristics needed for technique development.
Powerlifting (Deadlift, Squat, Bench)
Powerlifters drop extremely heavy weights (400-700+ lbs) but with more control than Olympic lifts. The primary concern is maximum impact absorption to protect the concrete or wood subfloor from repeated heavy drops. Thickness is paramount—¾-inch minimum for serious deadlifting.
CrossFit and Functional Fitness
These training styles mix moderate-weight barbell drops (200-350 lbs) with high-rep exercises, box jumps, and floor work. The weightlifting flooring needs versatility: adequate protection for lifting, easy to clean, and comfortable for bodyweight movements.
Why Thickness Matters
Fitness expert consensus from BarBend states: “People who lift weights, especially heavy weights, should purchase flooring that is at least half an inch thick. Three-fourths of an inch is better, and 1 inch is best.”
Thickness Guidelines:
- • 8mm (⅜”): Suitable only for light barbell work (<225 lbs) and dumbbell training
- • 20-30mm: Minimum for Olympic lifting, provides adequate bounce and protection
- • ¾-inch (19mm): Standard for heavy powerlifting and serious home gyms
- • Platform (2.25″ total): Maximum protection, ideal for Olympic lifting and competition training
Thickness is only half the picture — hardness decides whether a dropped barbell sinks in or bounces back. Our foam density vs Shore-A reference table lists the durometer ranges for rubber and the density ranges for foam.
Noise and Vibration Control
Noise reduction varies significantly by weightlifting flooring type:
- • Bare Concrete: 100% noise/vibration (baseline)
- • 8mm Rubber: 30-40% noise reduction
- • ¾-inch Stall Mats: 50-60% noise reduction
- • Lifting Platform: 50-60% noise reduction
- • Crash Pads (supplementary): Additional 60-70% reduction when combined with rubber base
For apartment dwellers, combining a rubber base with crash pads can achieve 70-80% total noise reduction—the difference between eviction notices and peaceful coexistence with neighbors.
Floor Type Deep Dive
Rubber Tiles (Interlocking) – 8mm to 30mm
Best For: Moderate lifting (200-350 lbs), modular flexibility, renters, mixed-use spaces
Price Range: $1.50-$4.00 per sq ft
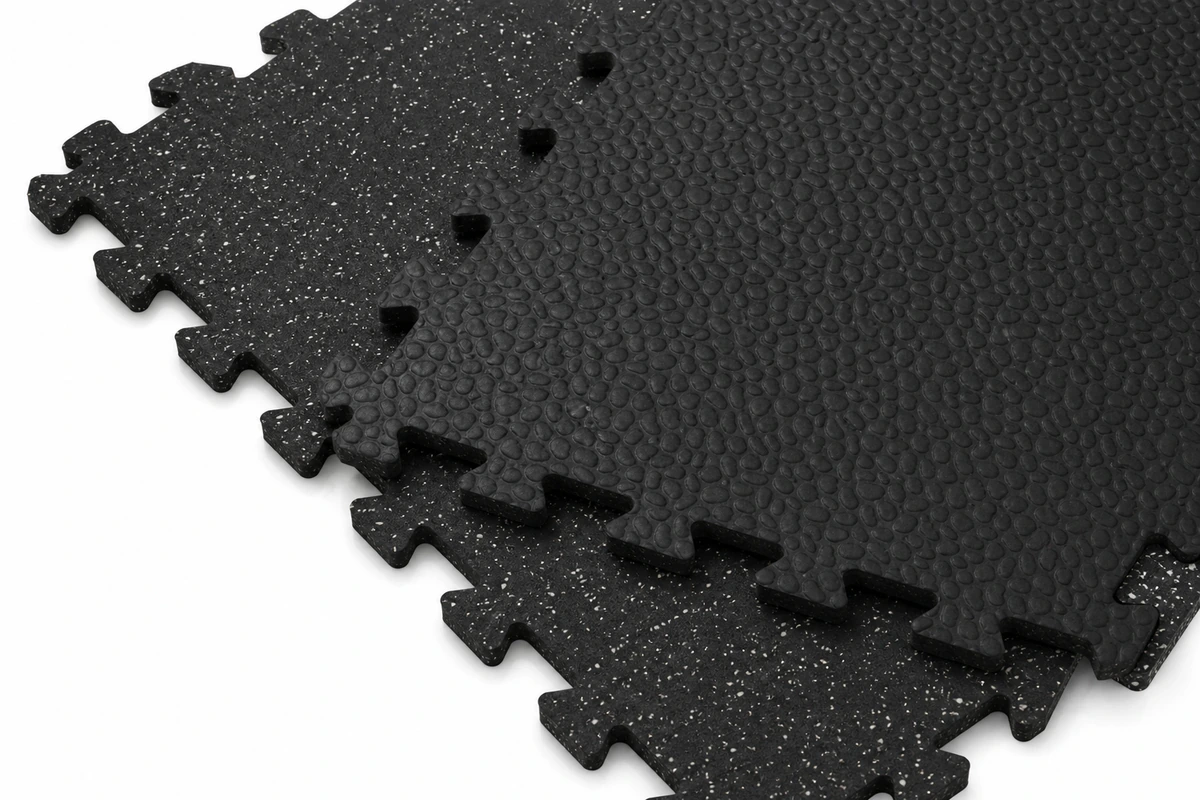
Interlocking rubber tiles offer the best balance of installation ease and performance for most home gym owners. The puzzle-edge design allows tool-free installation, and damaged sections can be replaced without tearing up your entire floor. This makes them an excellent weightlifting flooring choice for renters or those wanting maximum flexibility.
Thickness Options:
- • 8mm: Light lifting only, CrossFit warm-ups, dumbbell work up to 75 lbs
- • 10-15mm: Moderate barbell training (135-275 lbs)
- • 20mm+: Suitable for Olympic lifting with controlled drops
- • ¾-inch (19mm): Heavy-duty option approaching stall mat performance
Norsk Rubber-Tec Gym Tiles Recommendation
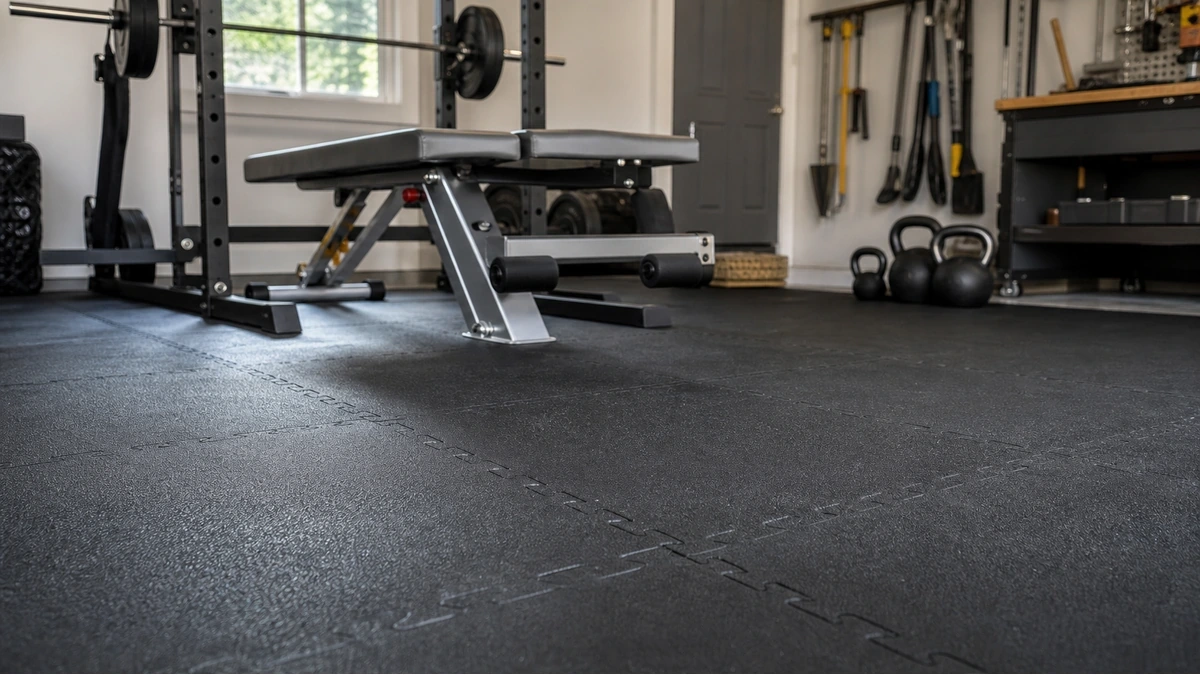
Norsk’s 0.70-inch Rubber-Tec gym tiles are a high-density foam co-polymer with a rubber-blend top layer — built for general training zones, not drop zones. They protect subfloors under racks, benches, and dumbbell work, install without adhesive, are odor-free unlike recycled rubber, and are easy to relocate. For repeated barbell drops, pair them with ¾-inch stall mats or a platform in your drop zone.
Pros:
- • Easy DIY installation (no adhesive required)
- • Modular coverage allows room expansion
- • Removable and relocatable (renter-friendly)
- • Good shock absorption at 8mm+
- • Interlocking prevents shifting during lifts
- • Damaged tiles can be replaced individually
Cons:
- • Seams may separate under extreme drops (400+ lbs from overhead)
- • 8mm thickness inadequate for Olympic lifting
- • More expensive than rolls for large areas (200+ sq ft)
- • Limited thickness variety compared to stall mats
Real-World Performance:
After six months of daily testing with deadlifts to 365 lbs and cleans to 225 lbs, our ¾-inch test tiles showed no visible wear, maintained tight seams, and provided 50-60% noise reduction compared to bare concrete.
Rubber Rolls – 4mm to 12mm
Best For: Large coverage areas (200+ sq ft), permanent installations, professional appearance
Price Range: $1.49-$3.00 per sq ft
Rubber rolls deliver a seamless, commercial gym aesthetic and become increasingly cost-effective as coverage area grows. The lack of interlocking seams eliminates the primary weakness of tiles—seam separation under heavy drops. For comprehensive comparison of different garage flooring options, our detailed guide covers installation methods and material choices.
Common Specifications:
- • Width: 4 feet (standard)
- • Length: Custom cut (25′, 50′, 75′, 100′)
- • Thickness: 8mm or 12mm most common
- • Material: Virgin rubber or recycled rubber
Horse Stall Mats (¾-inch) – Budget King
Best For: Heavy powerlifting (400-700+ lbs), maximum floor protection, extreme durability, budget builds
Price: $50-$75 per mat (~$0.83-$1.25 per sq ft)
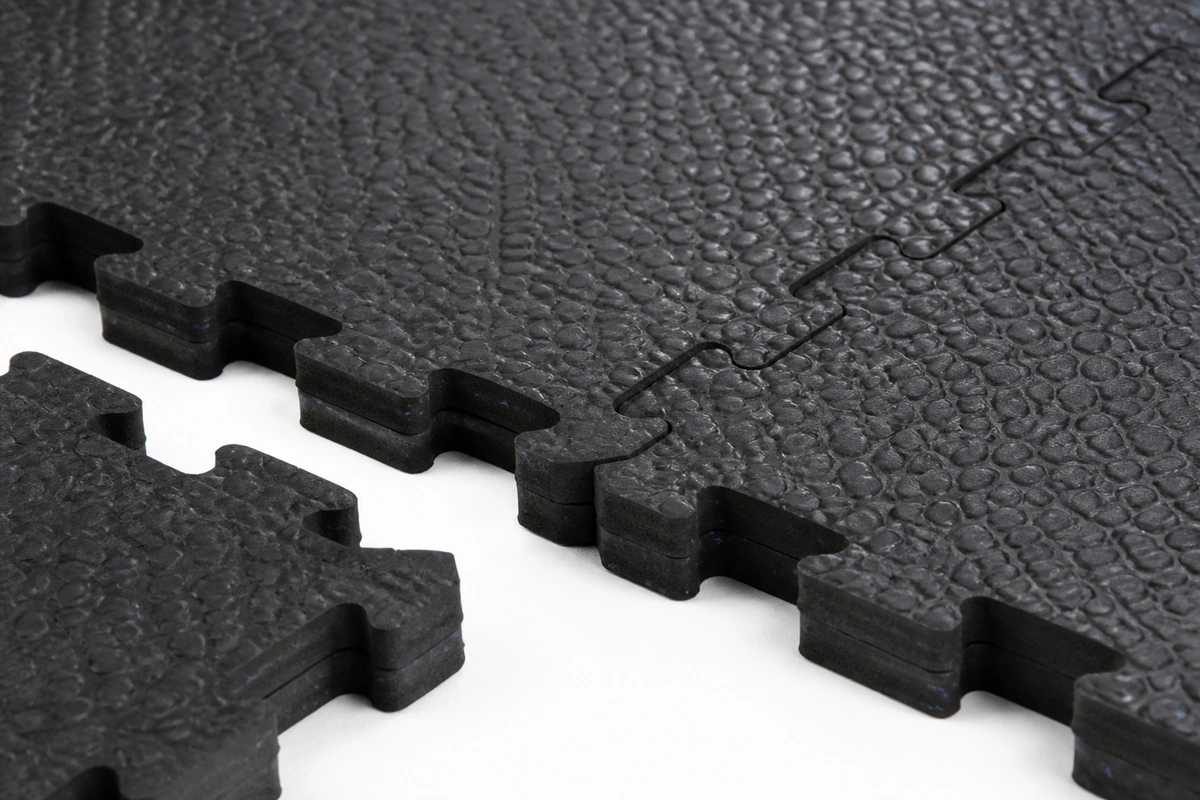
Horse stall mats represent the most cost-effective weightlifting flooring solution for serious lifters willing to handle the installation challenges. At ¾-inch thickness and designed to withstand 1,000+ pound animals, these mats easily handle the heaviest deadlifts and drops.
Standard Specifications:
- • Dimensions: 4′ x 6′ (24 sq ft per mat)
- • Thickness: ¾-inch (19mm)
- • Weight: ~94 lbs per mat
- • Material: Recycled rubber
- • Surface: Textured (designed for horse traction)
Pros:
- • Unbeatable cost per sq ft ($0.83-1.25 vs $2-4 for alternatives)
- • Extreme durability (designed for 1,000+ lb animals)
- • Proven 10-20 year lifespan from user reports
- • Perfect ¾-inch thickness for heavy drops
- • Excellent impact absorption
- • Simple maintenance—just sweep or mop
Cons:
- • Extremely heavy (requires 2+ people per mat)
- • Strong rubber odor initially (1-2 weeks outdoor airing required)
- • Requires cutting for custom fit (circular saw with carbide blade)
- • Limited availability (farm supply stores only)
- • No interlocking mechanism (use Gorilla tape for edges)
- • Rough surface texture uncomfortable for floor exercises
Lifting Platforms (DIY vs Pre-Made)
Best For: Olympic weightlifting, maximum floor protection, proper barbell bounce, dedicated lifting zones
Price Range: DIY $250-350 | Pre-Made $500-1,200+
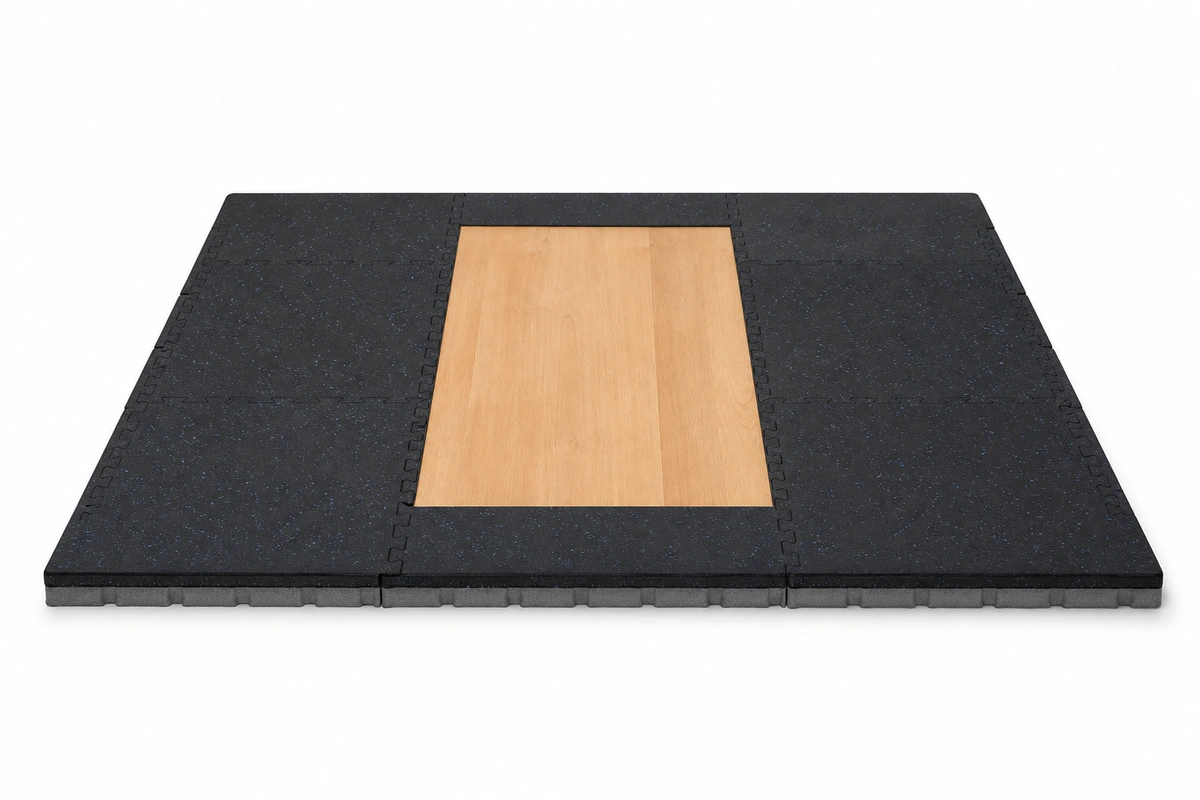
Lifting platforms represent the gold standard for weightlifting flooring in Olympic lifting and serious powerlifting. The multi-layer construction provides maximum subfloor protection, proper barbell bounce characteristics, and significant noise reduction.
Standard Platform Dimensions:
- • 8′ x 8′: Olympic competition standard, ideal for full movements
- • 6′ x 8′ or 6′ x 6′: Compact option for space-constrained home gyms
- • 4′ x 8′: Deadlift-specific narrow design
DIY Materials List (8′ x 8′ Platform):
- • 4 sheets ¾” plywood (4′ x 8′): $40-60 each = $160-240
- • 2 horse stall mats (4′ x 6′): $58.99 each = $118
- • 2½” wood screws: $15
- • 1¼” wood screws: $10
- • Optional: Wood glue ($8), sandpaper ($10), polyurethane finish ($20)
Total DIY Cost: $298-388 for 8′ x 8′ platform
Crash Pads / Drop Pads
Price Range: $129-$300 per pair
Crash pads add 4-6 inches of high-density foam in barbell drop zones, reducing noise and vibration by an additional 60-70% beyond standard rubber weightlifting flooring—making them essential accessories for noise-sensitive environments. For the complete apartment lifting setup—crash pads, platform layering, and noise strategies—see our apartment gym flooring guide.
High-Density EVA Foam Tiles – NOT Recommended for Weightlifting
Price Range: $0.50-$1.50 per sq ft
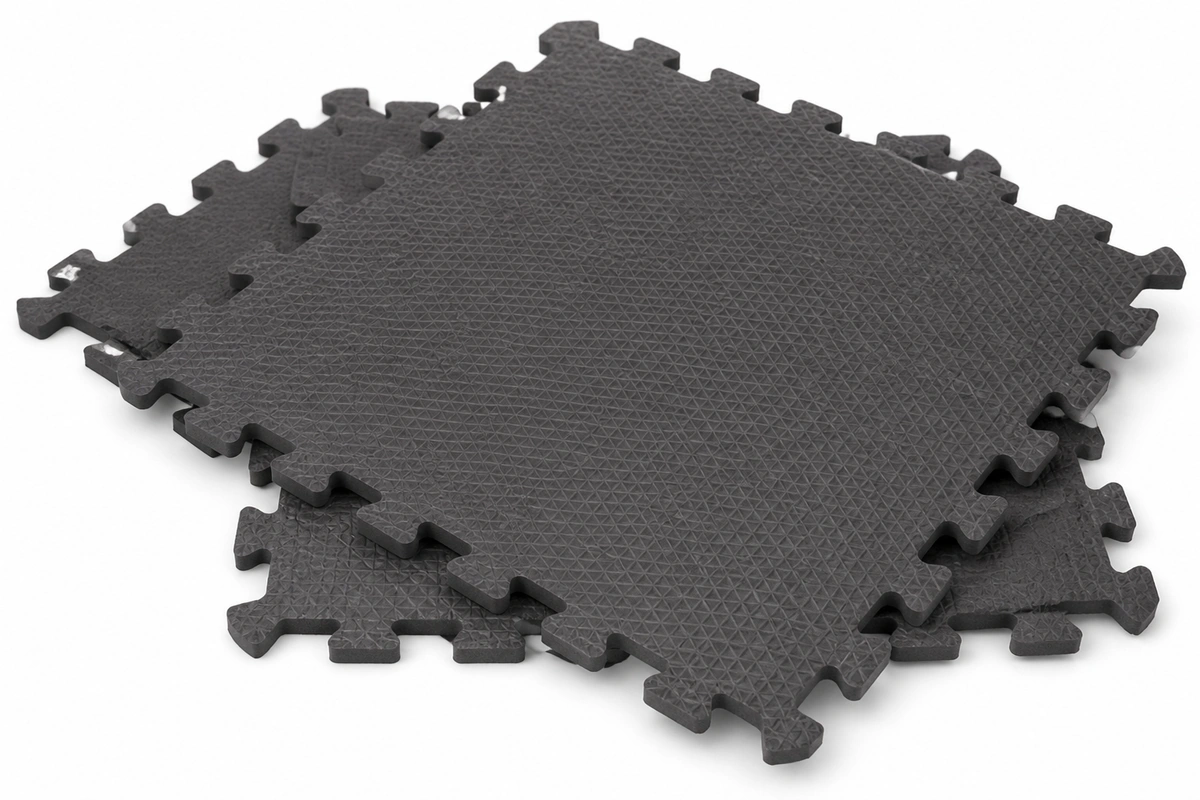
While EVA foam tiles are affordable and easy to install, they are categorically unsuitable for weightlifting flooring with barbells.
Why Foam Fails for Weightlifting:
- • Cannot withstand barbell drops—foam crushes and tears on impact
- • Permanent compression under heavy equipment (squat racks, benches)
- • Degrades within months under weightlifting use
- • Does not adequately protect subfloor from heavy drops
- • Creates unstable surface for heavy compound lifts (safety concern)
Thickness Decision Matrix
Choose weightlifting flooring thickness based on your typical drop weights and lifting style:
| Activity Type | Minimum Thickness | Recommended Thickness | Maximum Drop Weight |
|---|---|---|---|
| Dumbbell Work Only | 6mm (¼”) | 8mm (⅜”) | 50 lbs |
| Light Barbell Training | 8mm (⅜”) | 10mm (½”) | 135-225 lbs |
| Powerlifting (Controlled Drops) | 10mm (½”) | 19mm (¾”) | 315-405 lbs |
| Heavy Powerlifting | 19mm (¾”) | 19mm (¾”) + platform | 405-700+ lbs |
| Olympic Lifting (Light) | 20mm | 30mm | 200-275 lbs |
| Olympic Lifting (Serious) | 30mm | Platform + 19mm mats | 300+ lbs |
| CrossFit/Functional | 8mm | 10-12mm | 225-315 lbs |
Weightlifting Flooring For Home Gyms
A home gym — spare bedroom, finished basement, dedicated shed — usually sits on top of something that can be damaged: subfloor, drywall below, hardwood, or a slab you don’t want to crack.
Priority: Protect subfloor, control noise for the rest of the house, keep the room usable for other workouts.
Best choice: 3/4″ interlocking rubber tiles or horse stall mats laid in the drop zone, with thinner 8mm rubber extending across the rest of the lifting area for cardio and floor work.
For upstairs / over-finished spaces: Layer 8mm rubber base + crash pads where plates land. Combined, that’s 70–80% noise reduction versus bare subfloor. Bumper plates only — no iron plates dropped from height, ever.
Skip these: foam puzzle tiles, yoga mats, cheap 4mm rubber rolls. They compress under loaded barbells and transfer impact straight into the subfloor.
Weightlifting Flooring For Garage Setups
A garage weightlifting setup has to survive things a living-room home gym never sees: car oil, tire heat, concrete sealer, salt in winter climates, and 40°F temperature swings.
If your garage doubles as a CrossFit space — sled push, plyo, wall ball, rower — single-spec flooring won’t survive long. See our CrossFit-specific flooring guide for the four-zone framework that matches each activity to its right floor.
Priority: Durability against oil / chemicals / heat, stable surface over uneven concrete, works in unheated spaces.
Best choice: Horse stall mats (3/4″ thick, $50–75 each from Tractor Supply). They’re overbuilt for the job — designed for 1,000+ lb animals standing on them daily. Oil rinses off with a hose, they don’t crack in cold, and they’ll outlive the car parked next to them.
Upgrade for dedicated garage gyms: A DIY platform (6’×8′ or 8’×8′) on top of the stall mats. This gives you proper barbell bounce for Olympic lifts and a clean wood surface in the center for shoes. Total cost: $250–350.
Garage-specific watch-outs:
- Cold concrete + thin mats = slipping. 3/4″ minimum, textured surface.
- Oil stains pass through foam; rubber resists them.
- If you park a car on the same floor, put mats only in the lifting zone — hot tires will mark rubber.
Competition-Grade Platforms
If you’re training for Olympic weightlifting meets, USAPL powerlifting, or you just want the cleanest possible setup, a real platform is the answer.
Priority: Correct barbell bounce (wood center, not rubber), regulation dimensions, stable base that won’t shift under heavy pulls.
Competition specs: IWF Olympic platform is 4m × 4m (13’×13′). USAPL deadlift platforms are typically 8’×8′. For home training, 8’×8′ is the realistic “serious” build; 6’×8′ is the apartment-compatible compact version.
Build approach:
- Base: Two layers of 3/4″ plywood screwed together (flat, rigid, won’t flex).
- Center strip (where you stand): Additional 3/4″ plywood, ~4′ wide.
- Side drop zones: 3/4″ stall mats cut into 2’×8′ strips flanking the wood center.
- Surface finish: Polyurethane sealer on the wood center to prevent chalk / sweat damage.
Why the wood center matters: Rubber everywhere kills barbell bounce. For the snatch and clean, you want the bar to reach the lift without the plates “dying” into the floor. Wood gives you that; stall mats at the edges absorb the plate impact.
DIY cost: $250–350 (versus $800–1,500 for pre-built competition platforms).
When to buy pre-built instead: If you compete seriously and need IWF-certified equipment, or if you have no tools / time. Rogue, Rep Fitness, and Sorinex all make platforms that pass federation inspection.
Installation & Optimization
Installation Methods
Floating Installation (Most Common)
Suitable for: Interlocking tiles, stall mats
The simplest installation method involves placing weightlifting flooring directly on the subfloor without adhesive. The weight of rubber mats (94 lbs each) and interlocking tile design keeps flooring in place during training. If you’re setting up garage floor mats permanently, adhesive installation ensures long-term stability.
Noise Reduction Strategies
Choosing the right weightlifting flooring configuration makes a significant difference in noise reduction:
| Flooring Configuration | Noise Reduction vs Concrete | Ideal For |
|---|---|---|
| 8mm rubber only | 30-40% | Ground floor, detached homes |
| ¾” stall mats | 50-60% | Most home gyms, moderate noise concern |
| Platform only | 50-60% | Olympic lifting, moderate noise concern |
FAQ: Weightlifting Flooring Questions Answered
How thick should gym flooring be for deadlifts?
For moderate deadlifts (315-405 lbs with controlled drops), 8-10mm rubber is the absolute minimum, but ¾-inch (19mm) weightlifting flooring is strongly recommended. For heavy deadlifts exceeding 400 lbs, ¾-inch stall mats or a lifting platform is essential to protect your subfloor and reduce noise. Experts agree: “Three-fourths of an inch is better, and 1 inch is best” for serious weightlifting.
Do I need a platform for Olympic lifting?
A platform is highly recommended for regular Olympic lifting (snatch, clean & jerk), especially if you’re dropping 250+ lbs frequently. Platforms provide three critical benefits: proper barbell bounce for technique training, maximum subfloor protection, and significant noise reduction (50-60%). However, 30mm+ rubber tiles can work adequately for lighter Olympic lifting or apartment gyms where platform construction isn’t feasible.
Are horse stall mats good for a home gym?
Yes, horse stall mats are excellent weightlifting flooring for home gyms, particularly for powerlifting and heavy deadlifts. They offer unbeatable value (~$0.83 per sq ft), extreme durability (10-20 year lifespan), and ¾-inch thickness ideal for heavy drops. However, they’re extremely heavy (94 lbs each), have strong rubber odor initially (1-2 weeks outdoor airing required), and rough texture uncomfortable for floor exercises. If you’re serious about heavy lifting and can handle the installation challenges, stall mats provide the best performance per dollar.
Can you deadlift on 8mm rubber mats?
Yes, but with significant limitations. 8mm rubber mats are suitable for deadlifts up to approximately 315 lbs with controlled drops. Beyond that weight, or for frequent heavy deadlifts (400+ lbs), you should upgrade to ¾-inch weightlifting flooring or a platform to adequately protect your subfloor and equipment. Many lifters report that 8mm works initially but regret not starting with thicker flooring once their strength increases.
How do you reduce noise when dropping weights in an apartment?
A multi-layer weightlifting flooring system combining rubber base mats with crash pads can achieve 70-80% noise reduction versus bare concrete.
What’s the difference between rubber tiles and rubber rolls?
Rubber tiles offer easy interlocking installation (no adhesive), modular expandability, and removability ideal for renters and small spaces (under 200 sq ft). Rubber rolls provide seamless professional appearance, cost-effectiveness for large spaces (200+ sq ft), but require labor-intensive permanent installation with adhesive. Choose tiles if renting or want flexibility; choose rolls for permanent homeowner setups with large coverage areas.
How long do rubber gym mats last?
Lifespan depends primarily on thickness, material quality, and usage intensity: Horse Stall Mats (¾”) last 10-20 years with heavy powerlifting use; Interlocking Rubber Tiles (8-20mm) last 5-10 years with moderate use; Rubber Rolls (8-12mm) last 7-12 years with regular use; Crash Pads last 3-5 years with frequent Olympic lifting. Factors affecting longevity include drop frequency and weight, cleaning and maintenance, UV exposure, and rubber quality (virgin rubber lasts longer than recycled).
Can you install rubber flooring over carpet?
Not recommended for weightlifting. Carpet creates an unstable, uneven surface that compromises lifting form and safety, particularly for heavy compound lifts like squats and deadlifts. The carpet also reduces the weightlifting flooring’s impact absorption effectiveness because it compresses unevenly under weight. For serious weightlifting, install rubber flooring on hard, level surfaces—concrete, wood, or tile subfloors only. The stability and safety improvements justify removing carpet in dedicated gym spaces.
Bottom Line: Choosing Your Weightlifting Flooring
Weightlifting flooring isn’t one-size-fits-all. Olympic lifters need platforms or 30mm+ rubber for proper bounce and noise control. Powerlifters crushing 400+ lb deadlifts require ¾-inch stall mats or platforms for maximum floor protection. CrossFitters and functional fitness enthusiasts thrive with versatile 8-10mm interlocking tiles that balance lifting protection with floor exercise comfort. Apartment lifters must invest in crash pads to achieve the 70-80% noise reduction necessary for neighbor-friendly training.
Quick Decision Framework:
- • Budget Builder ($300-500): Horse stall mats from Tractor Supply — 10-20 year lifespan, unbeatable cost per sq ft, handles heaviest deadlifts
- • Olympic Lifter ($250-400): DIY 8′ x 8′ platform with stall mat sides — proper barbell bounce, maximum subfloor protection, saves $400-800 vs pre-made
- • Powerlifter ($300-700): ¾-inch stall mats or platform — ultimate floor protection, extreme durability, handles 500+ lb drops
- • Apartment Dweller ($400-700): 8mm rubber base + crash pads — 70-80% noise reduction, neighbor-friendly, protects against complaints
- • Versatile Home Gym ($600-1,000): Norsk Rubber-Tec Gym Tiles (0.70″) in the general training zone plus ¾” stall mats in the drop zone — easy installation, modular flexibility
Final Recommendation: Don’t cheap out on thickness hoping to save money initially. Starting with 8mm to “save budget” often leads to expensive upgrades when you outgrow it at 315+ lbs within a year. If you’re serious about strength training and plan to progress beyond 315 lbs, invest in ¾-inch weightlifting flooring or platforms from the start. The $200-300 you save now will cost you double that in replacement costs plus the frustration of inadequate protection during your training progression.
Action Plan: Get Your Weightlifting Flooring Installed
- 1 Determine Your Lifting Style – Olympic lifting → Platform (DIY $250-350 or pre-made $500+) or 30mm+ rubber tiles; Powerlifting → ¾” stall mats ($300-500 for 200 sq ft); CrossFit/Functional → 8-10mm interlocking tiles ($400-700)
- 2 Measure Your Space – Minimum coverage: 6′ x 8′ (basic lifting zone); Ideal coverage: 8′ x 10′ to 10′ x 12′ (full gym with equipment); Check ceiling height if building platform (adds 2.25 inches); Measure doorways—stall mats may not fit through standard doors
- 3 Set Your Budget – Budget: $300-500 (stall mats, DIY platform materials); Mid-range: $600-1,000 (interlocking tiles, small platform); Premium: $1,200+ (pre-made platform, large tile coverage with ¾” thickness)
- 4 Consider Your Living Situation – Renting → Interlocking tiles (completely removable, no damage); Own home → Rolls or stall mats (permanent installation acceptable); Apartment → Add crash pads for noise reduction ($129-300); Garage → Any option works (prioritize durability and protection). For garage-specific flooring options, see our interlocking garage floor tiles guide
- 5 Purchase Your Weightlifting Flooring – Choose from Norsk-Stor products, horse stall mats, crash pads, or DIY platform materials based on your needs and budget
- 6 Install and Test – Start with floating installation (no adhesive initially); Test with lighter weights first (135-225 lbs); Verify stability and noise levels; Add crash pads if noise exceeds acceptable levels; Tape mat edges with Gorilla tape if shifting occurs
Protect your floors. Lift with confidence.